Showing posts with label handmade. Show all posts

Wednesday, August 20, 2014

DIY Puzzle Bags


Materials:

Extra wide double fold bias tape (1/2” wide)
12 or 16 gauge clear vinyl
Velcro
Coordinating thread

Instructions:


Measure the height and width of your puzzle, making sure to include the thickness of the puzzle. Add about 1-1.5 inches to the width so that you can easily slide your puzzle in and out. You are essentially making a vinyl envelope, so you will need to double the height of the puzzle and add a few more inches for the flap. For example, a standard sized wooden Melissa and Doug puzzle measures approximately 12.5” W x 9” H. I cut my vinyl to 13.5” x 22”.


Make a mark on each long edge, approximately 5” in from one of the short edges. This will be the top of your envelope, and you will end up with a 5” flap.

Set your stitch length to 3.5. On the opposite short end, sew a strip of bias tape. Back stitch at both ends and trim any excess bias tape. (Tip: I highly recommend using Clover Wonder Clips (http://www.amazon.com/Clover-Wonder-Clips-Per-Pack/dp/B004ZKPX8A) when sewing with vinyl, as they do not leave holes and are easy to reposition).


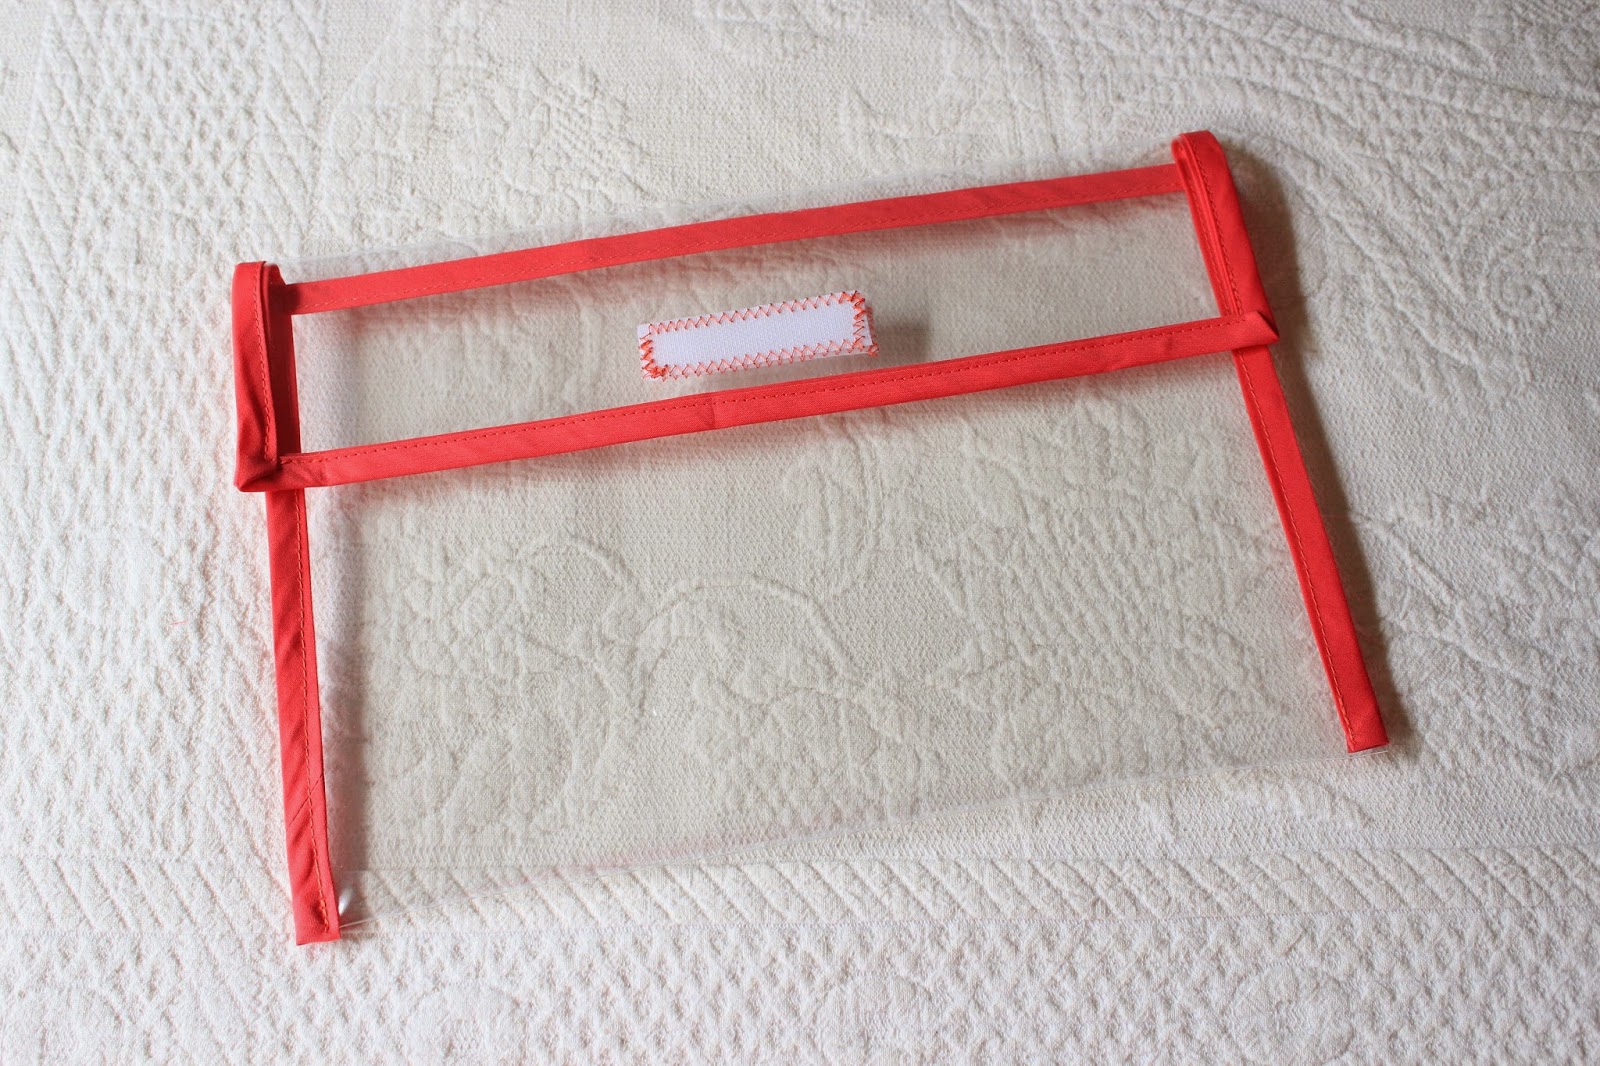
Next, cut a 3” long strip of velcro. Set your machine to a zig-zag stitch with stitch length of 2.5. Attach the hook side (scratchy side) approximately 2.5” in from the edge you have just encased in bias tape, centering it. I find it helpful to use a small piece of painters tape to mark where I want to place the velcro. Sew around all four edges of the velcro with a zig-zag stitch.


Fold the edge with bias tape/velcro up to the 5” flap marks you made earlier and clip in place. Make sure the velcro is facing out. Fold one end of the bias tape into a triangle then fold down. 


Beginning at one of the bottom corners, sandwich both layers of vinyl inside your bias tape.  Clip in place. Set your machine to a straight stitch with a stitch length of 3.5. Sew along the edge until you reach the first flap corner. Sew right up to the edge then backstitch. 


Remove the envelope from your machine and trim threads. Fold the corner and clip in place. 


Beginning a few stitches before the corner, sew around the corner and continue along the edge. Repeat steps for next flap corner. Continue sewing the bias tape around the edge of the envelope until you reach the end.


Fit your puzzle inside the envelope and close the flap snuggly. Mark where the loop/soft side of the velcro should go. (It’s best to place the soft side of the velcro on the flap so it doesn’t scratch your hand when you slide the puzzle in and out.) This should be approximately 3/4”-1” in from the edge. Make sure it is centered/lined up with the other side of the velcro. Attach to the inside of the flap with a zig-zag stitch, stitch length 2.5.


These bags are also useful for storing slightly thicker items.


My two year old daughter can easily open the bags and enjoys sliding her puzzles in and out. 

No more missing pieces! Now all your puzzles can be stored neatly together on the shelf.


Tuesday, August 5, 2014

Time for Tea!

After seeing this pattern by Ric Rac for a plush tea set, I couldn't wait to make one for Vera. I chose a fabric line called Happy Go Lucky by Bonnie and Camille for its colorful, playful prints. I gave the set to Vera for her birthday and she loves playing with it! The other day I caught her trying to pour water into it from her sippy cup and had to laugh. It was a little damp but otherwise unharmed. I guess that's one downside of a plush tea set; only imaginary tea served here!


Overall, I didn't have any problems with the pattern, but I did make a few minor changes. I felt the teapot handle was a little floppy so I shortened it at each end by about 1/2". I also made a small bag filled with rice and put it inside the base of the teapot. This helped weigh the teapot down a bit and keeps it from tipping over. (Make sure you freeze the rice overnight so you don't have any critters hatch inside you teapot!)

Looking forward to many tea parties with my little girl!


Thursday, May 29, 2014

$26 Folding Floor Cushion


The idea of a folding floor cushion for kids is nothing new; I've seen several variations of this project online. However I still wanted to share because I think it's such a great project. To make my cushion, I loosely followed this tutorial by you and mie.


Materials and cost:
4 extra firm pillows: $24
1 full sized bed sheet or approximately 2 yards of fabric. I got a vintage sheet from the thrift store for about $1.
8 5/8" or larger buttons: $1

Total cost: $26

I made a few minor changes. Since my fabric was fairly thin, I ironed light-weight interfacing into both hems along the long side of the cushion cover, where the buttons would go.


It fits perfectly on the floor of Vera's closet, making a comfy place for some quiet reading. One of the best things about this cushion is all the different ways you can fold it. It would also make a great floor cushion for movie night.


Saturday, May 3, 2014

Bedrail Cover Tutorial


Vera has learned to climb out of her crib so she will be moving into a regular bed soon. We are skipping the toddler bed and going straight to a twin-sized bed with a bedrail. My mother-in-law found a bedrail for us at a rummage sale. It was in great shape but had a bright blue cover, not exactly the look I was going for. Luckily the cover was removable, and I made a simple slipcover for the rail out of unbleached cotton osnaburg (the same fabric I used for these projects).


Materials:
1 1/2 yards of fabric
21" (approx 3/4 yard) Velcro
Coordinating thread
Sewing machine
Fabric marking pen
Pins
Rotary cutter or scissors
Serger or pinking shears
Tape measure or ruler

Instructions:

All seams are 1/2" unless otherwise noted.
First, trace your existing cover, adding 1/2" to the sides and top and 1" to the bottom for seam allowance. Cut two, one for each side of the cover.


Press the bottom edges of both pieces 1/2" then another 1/2".


Increase your stitch length to 3.5 and edge stitch the bottom hem for one side of the cover only.

Measure the zipper on the bottom of the original cover. Mine measured 39" so I cut a strip of fabric 40" x 7" long. This will become a flap with velcro at the bottom of the cover. Fold the strip of fabric in half lengthwise, right sides together, and sew both short ends. Trim the seams, clip the corners, and turn right side out.


Take the other side of the cover, the one with the unsewn hem, and lay wrong side up. Tuck the raw edge of the flap into the bottom hem of the cover, making sure it is centered. Pin in place.


With your stitch length still set at 3.5, edge stitch the hem, sewing on top of the flap as you go.


With the cover still facing wrong side up, press the flap down toward the bottom of the cover.


Turn over so right side is facing up and pin flap in place. With your stitch length still set at 3.5, edge stitch.


This is how the cover will look from the right side (outside) once the flap is finished.


Pin the two main cover pieces together, right sides facing. (Make sure you set your machine back to its standard stitch length, usually 2.5. If you're unsure of the fit, you can first sew the two pieces together with a basting stitch, then test the fit on your bedrail frame before sewing together with a smaller stitch length). Sew the two pieces together along the sides and top, leaving the bottom side with the flap open. You can use either a serger or pinking shears to finish the seams.

Turn right side out.

Cut seven 3" lengths of velcro (both the hook and loop sides). The soft side will be attached to the main cover and the rough side will be attached to the flap. Mark the main cover 2" up from the bottom edge, spacing the marks 3" apart. Repeat for the flap, marking 1/2" from the outer flap edge.


Sew on the velcro.


Pull the cover over your bedrail frame and secure with velcro.


Monday, April 28, 2014

12" Baby Doll Dress and Bloomers- Free Pattern!

Vera's baby doll was in need of a new outfit, so I made her a dress and set of bloomers. When Vera woke up from her nap, I proudly showed her baby doll's new attire to her. "Vera, look what Mommy made for your baby!" to which she replied "Noooo!"and immediately removed the new dress and tried to put the old worn-out outfit back on. That girl does not like change. Fortunately, she warmed up to the new clothes after a few days and now loves dressing and undressing her doll.


This pattern was made to fit a 12" Waterbabies Doll but will fit most 12" dolls with a few minor modifications. I won't be providing a step-by-step tutorial with this pattern, but have included a few helpful tips. To get the pattern, simply right-click on the images below and save. Print at full scale.